Real Strength. Real Progress. Real Confidence.
Want stronger arms, better posture, and a more functional upper body that supports everything from your workouts to your daily life?This back and biceps workout for midsize women is built with your body in mind, real moves, real progress, and a focus on building confidence, not just muscle.
If you’re a midsize woman who wants to feel strong, supported, and more at home in your own body, this workout will help you do exactly that.
No crash goals. No impossible standards. Just strength that sticks.
Why Back & Biceps Matter Especially for Midsize Women
A strong back and arms don’t just “look good.” They:
✅ Improve posture, no more slouching after long hours at a desk
✅ Naturally balance your frame and enhance your curves
✅ Help with everyday strength like carrying bags, lifting kids, pulling doors
✅ Boost confidence, so you feel powerful in and out of the gym
Your upper body is part of your power. It deserves just as much attention as your legs or core, especially if you sit at a desk, have posture struggles, or feel weak in your arms.
Midsize-Friendly Mindset Reminder
You don’t have to look a certain way to train hard.
You don’t need permission to take up space.
You’re not here to “fix” your body, you’re here to honor it.
That’s what real fitness is.
Warm-Up: Activate & Protect (5–7 Minutes)
A proper warm-up reduces injury risk and helps your muscles fire properly. Focus on movement that opens up your shoulders and activates your upper back.
Warm-Up Routine:
| Exercise | Duration/Reps | Purpose |
|---|---|---|
| Arm Circles | 30 sec forward/back | Loosens shoulders, increases blood flow |
| Scapular Push-Ups | 10 reps | Engages upper back & scapular control |
| Band Pull-Aparts | 15 reps | Activates rear delts and postural muscles |
| Light Cardio (march/jacks) | 1–2 min | Raises heart rate, warms full body |
This primes your joints and helps build a strong mind-body connection before lifting.
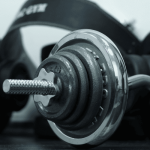
Back and Biceps Workout for Midsize Women
| Exercise | Muscle Group | Sets | Reps | Equipment |
|---|---|---|---|---|
| Lat Pulldown | Lats, upper back | 3–4 | 10–12 | Cable machine or band |
| Dumbbell Bent-Over Row | Mid-back, biceps | 3–4 | 8–10 | Dumbbells or barbell |
| Cable Face Pull | Rear delts, traps | 3–4 | 12–15 | Cable or resistance band |
| Rear Delt Dumbbell Fly | Rear shoulders | 3–4 | 10–12 | Dumbbells |
| Dumbbell Bicep Curl | Biceps | 3–4 | 8–10 | Dumbbells |
| Hammer Curl (Superset) | Biceps, forearms | 3–4 | 8–10 | Dumbbells |
This workout includes 4 effective back moves and 2 targeted biceps exercises. All are adjustable based on your equipment and fitness level.
Lat Pulldown
Muscles Targeted:
- Primary: Latissimus dorsi (lats)
- Secondary: Biceps, rhomboids, rear delts
Strong lats are the foundation of a sculpted back, improved posture, and overall pulling strength. Whether you’re reaching overhead, carrying heavy bags, or sitting at a desk all day, your back muscles play a critical role in how your upper body functions and feels.

How to Perform:
- Sit tall at the lat pulldown station, feet flat, knees snug under the pad.
- Grip the bar slightly wider than shoulder-width, palms facing away (overhand).
- Start with arms fully extended and shoulders relaxed.
- Pull the bar straight down toward your upper chest, lead with your elbows, not your hands.
- At the bottom, squeeze your shoulder blades together.
- Slowly return to the start with control, avoid letting the weight jerk upward.
Form & Coaching Cues:
✅ Chest lifted and spine tall, don’t lean back excessively.
✅ Elbows pull down and back, imagine tucking them into your back pockets.
✅ Avoid using momentum. If you’re swinging or jerking, the weight is too heavy.
✅ Keep wrists neutral, not bent or overly flexed.
✅ Breathe out as you pull, breathe in as you release.
Modifications & Equipment Alternatives:
- At Home: Loop a long resistance band over a door anchor or pull-up bar. Kneel or sit to create tension, and mimic the same pulling pattern.
- Beginner Tip: Use a lighter weight and focus on that mind-muscle connection, feeling the lats activate before adding more load.
Prescription:
🔁 4 sets of 10–12 reps
🕒 Rest 60–90 seconds between sets.
Pro Tip:
Think about pulling your elbows to your ribs not just moving the bar. This keeps tension on the lats and prevents your arms from dominating the movement.
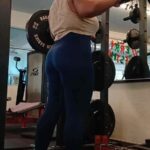
Dumbbell Bent-Over Row (or Barbell Row)
Muscles Targeted:
- Primary: Mid-back muscles (rhomboids, traps, lats)
- Secondary: Rear delts, biceps, core stabilizers
The bent-over row is a powerhouse move for building a strong, stable back that supports better posture, lifts, and overall upper body strength. It balances out the pressing motions you do (like push-ups or bench press) and helps prevent the rounded shoulders common with desk jobs.
How to Perform:
- Stand with feet hip-width apart, holding dumbbells (or a barbell) with a neutral grip (palms facing in for dumbbells, overhand for barbell).
- Hinge forward at the hips, keeping a slight bend in the knees, and maintain a flat, neutral spine from head to tailbone. Your torso should be nearly parallel to the floor.
- Let your arms hang straight down from your shoulders, dumbbells or barbell in hand. Brace your core to protect your lower back.
- Pull the weights toward your lower ribs or belly button by driving your elbows back close to your body.
- Squeeze your shoulder blades together at the top of the movement.
- Lower the weights back down with control don’t let gravity take over.
Form & Coaching Cues:
✅ Keep your spine neutral avoid rounding or arching your back.
✅ Engage your core, brace as if preparing for a punch to the stomach.
✅ Drive elbows straight back, not out to the sides.
✅ Keep your neck neutral avoid craning your head up or down.
✅ Avoid using momentum; focus on controlled, deliberate movement.
✅ Exhale as you row the weight up, inhale as you lower it.
Modifications & Equipment Alternatives:
- Beginners: Start with lighter dumbbells or even just bodyweight movement practicing hip hinge and scapular retraction.
- At Home: Use dumbbells, water bottles, or a weighted backpack for resistance.
- Barbell Option: Great for heavier loads once your form is solid.
Prescription:
🔁 4 sets of 8–10 reps
🕒 Rest 60–90 seconds between sets.
Pro Tip:
Think about pulling through your elbows, not your hands, to maximize mid-back engagement and minimize biceps dominance. Keep the movement smooth and controlled to protect your lower back.
Cable Face Pull
Muscles Targeted:
- Primary: Rear deltoids (rear shoulders), trapezius, rhomboids
- Secondary: Rotator cuff muscles, upper back stabilizers
Face pulls are a must-do for correcting posture, especially if you spend a lot of time sitting or working at a desk. They strengthen the muscles that pull your shoulders back and down, helping to combat the rounded shoulder and forward head posture that often leads to neck and shoulder pain. This exercise also promotes shoulder health and stability, reducing injury risk.
How to Perform:
- Attach a rope handle to a cable machine at about eye level.
- Stand facing the machine with feet hip-width apart, knees slightly bent. Grab the rope with an overhand grip (palms facing down) and step back to create tension on the cable.
- Engage your core, keep your chest up, and maintain a slight bend in your elbows.
- Pull the rope toward your face, flaring your elbows out to the sides so your upper arms are parallel to the floor at the end of the movement.
- Squeeze your shoulder blades together, focusing on using your rear delts and upper back muscles.
- Slowly reverse the movement to the starting position, controlling the resistance.
Form & Coaching Cues:
✅ Keep your neck neutral and chest lifted throughout the movement.
✅ Don’t shrug your shoulders up keep them down and back.
✅ Elbows should stay high, in line with your shoulders.
✅ Avoid using momentum; move deliberately and with control.
✅ Breathe out as you pull, breathe in as you return.
Modifications & Equipment Alternatives:
- At Home: Use a resistance band anchored at eye level; perform the same pulling motion.
- Beginners: Start with lighter resistance bands or lower cable weight to master form.
- Advanced: Increase weight or slow down tempo for increased time under tension.
Prescription:
🔁 4 sets of 12–15 reps
🕒 Rest 30–60 seconds between sets.
Pro Tip:
Focus on initiating the movement with your shoulder blades (scapular retraction) before pulling with your arms to maximize upper back activation and improve shoulder health.
Rear Delt Dumbbell Fly
Muscles Targeted:
- Primary: Rear deltoids (rear shoulders)
- Secondary: Upper trapezius, rhomboids, rotator cuff muscles
The rear delt fly is crucial for building balanced shoulder strength and improving posture. Many people overtrain the front shoulders and chest, which can lead to rounded shoulders and discomfort. Strengthening the rear delts helps pull the shoulders back, enhancing upper-body alignment and reducing the risk of shoulder injuries. It also supports better movement in daily activities like lifting and reaching behind you.
How to Perform:
- Hold a dumbbell in each hand.
- Stand with feet hip-width apart, knees slightly bent. Hinge forward at the hips until your torso is almost parallel to the floor, keeping a neutral spine and a slight bend in the elbows.
- Let your arms hang straight down from your shoulders, palms facing each other.
- With controlled motion, raise your arms out to the sides in a wide arc, squeezing your shoulder blades together at the top of the movement.
- Pause briefly, then slowly lower the dumbbells back to the starting position.
Form & Coaching Cues:
✅ Maintain a flat back and avoid rounding your shoulders or lower back.
✅ Keep your elbows slightly bent throughout the movement don’t lock them.
✅ Move slowly to avoid using momentum, focusing on the muscle contraction.
✅ Keep your neck neutral, gaze down a few feet in front of you to protect your spine.
✅ Exhale as you lift the weights, inhale as you lower them.
Modifications & Equipment Alternatives:
- At Home: Use light dumbbells, water bottles, or resistance bands to replicate the movement.
- Beginners: Start with lighter weights to focus on control and form.
- Advanced: Increase weight or perform the exercise with a slight pause at the top for greater muscle engagement.
Prescription:
🔁 4 sets of 10–12 reps
🕒 Rest 30–60 seconds between sets.
Pro Tip:
Focus on squeezing your shoulder blades together as you lift to maximize rear delt activation and improve posture.
Biceps Superset (Back-to-Back Burnout)
This superset is designed to maximize biceps engagement by working the muscles from different angles in a single, continuous effort. Supersets increase intensity and help build muscular endurance, tone, and strength efficiently perfect for busy schedules and building noticeable arm definition.
a. Dumbbell Bicep Curls
Muscles Targeted:
- Primary: Biceps brachii (the main “bulge” muscle on the front of your upper arm)
- Secondary: Brachialis and brachioradialis (assist in elbow flexion)
How to Perform:
- Stand tall with a dumbbell in each hand, arms fully extended, palms facing forward.
- Keep your elbows close to your sides and stationary throughout the movement.
- Slowly curl the dumbbells toward your shoulders by bending your elbows.
- Pause briefly at the top, squeezing the biceps.
- Lower the weights back down with control.
Coaching Tips:
✅ Avoid swinging your body or using momentum, control is key.
✅ Keep your wrists neutral and straight to prevent strain.
✅ Exhale while curling up, inhale while lowering.
✅ Maintain a steady, slow tempo to maximize muscle tension.
➡️ Go straight into:
b. Hammer Curls
Muscles Targeted:
- Primary: Biceps brachii (brachialis head) and brachioradialis (forearm muscles)
- Secondary: Helps improve grip strength and arm stability
How to Perform:
- Hold dumbbells at your sides with palms facing your body (neutral grip).
- Curl the weights upward by bending your elbows, keeping palms facing inward throughout the movement.
- Pause and squeeze the muscles at the top.
- Lower the dumbbells back down slowly.
Coaching Tips:
✅ Keep your elbows tucked in close to your body.
✅ Avoid leaning back or swinging the weights.
✅ Focus on smooth, controlled movements to engage the forearms and biceps equally.
✅ This grip reduces wrist strain and enhances forearm development.
Superset Execution:
- Perform Dumbbell Bicep Curls immediately followed by Hammer Curls without resting in between.
- Rest for 30–60 seconds after completing both exercises.
- Repeat for 4 sets of 8–10 reps each.
Combining these two curls targets the biceps through different grip positions, promoting balanced muscle development and preventing overuse injuries. The continuous effort increases metabolic demand, helping to sculpt and tone your arms efficiently.
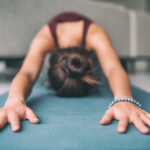
Cool Down (3–5 Minutes)
Cooling down is essential after your workout to gradually lower your heart rate, reduce muscle tightness, and kickstart recovery. Focus on gentle stretches that target the muscles you just worked, your back, shoulders, and arms.
- Biceps wall stretch – 30 sec per arm
- Lat stretch against doorway – 30 sec per side
- Neck & shoulder rolls – 10 each way
- Deep breathing – 4 slow breaths to reset
You showed up. Now help your body reset.
Tips for Midsize Women in the Gym
- Form First, Always
Start with lighter weights and focus on mastering your technique. Good form builds real strength and helps prevent injuries, so it’s the best foundation for long-term progress. - Own Your Progress
Forget comparing yourself to others. Celebrate how your posture improves, how everyday activities get easier, and how confident you feel. Your journey is unique and meaningful. - Dress for Confidence
Choose workout clothes that make you feel comfortable and supported, think high-waisted leggings, breathable tops, and well-fitting sports bras. When you feel good in your gear, your confidence naturally rises. - Celebrate Every Rep
It’s not about how much weight you lift or calories burned, it’s about consistency and effort. Every rep you complete is a personal victory and a step closer to your goals.
FAQ: Back and Biceps Workout for Midsize Women
Q: Can midsize women build upper body strength without bulking up?
A: Absolutely! Women naturally have lower testosterone levels than men, so strength training usually leads to lean muscle and toning, not bulk. This workout focuses on building functional strength, improving posture, and boosting metabolism for a sculpted, confident upper body without unwanted size.
Q: Can I do this back and biceps workout at home?
A: Yes! You don’t need a full gym to get strong. Use resistance bands, dumbbells, or even household items like a backpack filled with books. For example: swap cable face pulls for band face pulls, use bands for lat pulldowns, or substitute a sturdy chair for a bench. Adapt to what you have and keep progressing.
Q: How often should I train back and biceps?
A: Aim for 1–2 sessions per week, allowing at least 48 hours between workouts for recovery. You can combine this routine with leg or full-body days to create a balanced weekly plan.
Q: What should I prioritize: weight, form, or frequency?
A: Form always comes first. Perfect your technique before adding weight or increasing workout frequency. Consistency and safe, joint-friendly movements will build strength and prevent injury over time.
Q: How can I tell I’m making progress if the scale doesn’t change?
A: Focus on functional wins: better posture, stronger grip, improved confidence with gym equipment, less soreness, and easier daily tasks like carrying groceries or reaching overhead. Strength and mobility improvements are far better indicators of success than the scale alone.
Final Thoughts
This Back and Biceps Workout isn’t just about building muscle, it’s about building confidence, control, and a sense of power in your own body.
👉 For a complete upper-body program, pair this session with our Chest & Shoulder Workout for Midsize Women a push-day plan designed to help you improve posture, sculpt your upper body, and build balanced strength.
👉 Don’t forget your lower body. Our Leg Day Workout for Midsize Women focuses on glutes, quads, and hamstrings, essential for stability, strength, and long-term joint health.
You don’t need to be perfect. You don’t need to be small. You just need to be consistent. Your body is capable. Your strength is real. And your gym journey is 100% yours.


Leave a Reply